let's see, we have a mask, a murder bag, gloves and shoes.... just how many props does one costume need? a lot apparently ;) dr. killinger *is* a doctor after all so he needs a stethoscope.

i picked this up at a local surplus store. it's an actual working stethoscope! but it was black. i painted the tubing with silver fabric paint. fabric paint so it will remain flexible and not chip off.... works like a dream!
next came the handcuffs (he keeps his magic murder bag handcuffed to his wrist.... one can't let those wondrous secrets get out ;)

these were just cheap metal costume cuffs i found. even though they were already silver colored i felt i needed to help them fit in with the other painted items so i added a touch of the fabric paint

next up, the umbrella.... because no evil mary poppins figure is complete without one!

i started with this. it was the closest i could find.... black fabric with a crooked handle, but it still needed some painting.

i added red fabric paint to the outlines of the umbrella.... following the contours like the illustration lines in the cartoon.

i also painted the handle and shaft.... and coated this in hard coat mod podge to protect it. (have i mentioned lately how much i love that stuff??)

the red edges make for a really cool effect when the umbrella is closed
next up, the coat!
he's really wearing a black 3/4 sleeve chef's coat. you can find them made for women, but i wanted to save some $$ and make it myself, but i couldn't find a chef's coat pattern in a women's cut and since i already was spending a lot of time and work on this i didn't want to have to drape a coat so i decided to modify a pattern... this is the closest thing i could find:

it worked really well. there were several options built into the pattern. once i figured out which version i would make i still needed to mod it a bit. my modifications were to add 3 inches to the with of the front panels (so the buttons were farther apart), use only the collar base to make the mandarin collar, lost the belt and belt loops, and take a smaller seam allowance for the with of the coat so it was a little more roomy without being too shapeless (the sleeves and shoulder seams stayed the same)

again, to up the cartooniness i followed the contour lines of the coat with some silvery grey bias tape (i couldn't find piping in the right shade ;)

the buttons were the cover your own kind that i just glued together and painted with the metallic fabric paint for that slightly unreal look. you can also see how i got out of making buttonholes for this..... i despise sewing buttonholes, but love buttons!

here you can see the effect of the buttons, 'piping' and stethoscope together.....

i cut the killinger logo out of some red faux leather i had and sewed it on the coat (the same stuff i painted and used on the murder bag)

and the coat is lined in red satin ;)
and one might wonder what i wore under the coat?

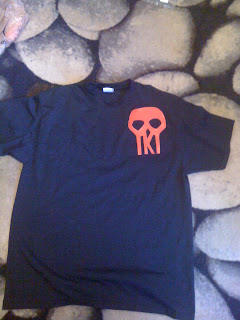
just a black t-shirt with the same logo process as the jacket because i knew i'd get warm if i was inside with a lot of people. this worked out quite nicely.

also, on my legs were just a pair of black leggings i gave the same treatment as the gloves (red fabric paint contour lines)
and here he is in all his glory:
one note. i wore this for two parties... the first one i just powdered my hair. it looked really great except it was really messy... i had powder everywhere! not the greatest choice when you're costume is black :/ we took these photos on the next day before the second party... i found some spray color, but it really didn't work well at all...... i may just invest in a grey wig :(
thanks so much for looking! i'll be back later this week with Dr. Rusty Venture!
have a safe and happy halloween!
-sarah


It is always amazing what you create. What fabric did you use for the coat?
ReplyDeleteLove, love, love, love, love! You have the greatest attention to detail. (and I love that swishing goodbye picture of you/Killinger walking away) :)
ReplyDeletethanks! oh, the coat is a satin. i really didn't want to have to use pleather and it still gives it that shiny look... the logo on the coat is a faux leather.
ReplyDelete